Practically A New Car Thanks To Chipex!! GIVEAWAY!!

This Christmas pick is for those car guys! Or even gift to you car! I drive a 2012 Honda CRV which still looked amazing until someone put a big ding in the door and then bam it seemed like my car was a magnet for every shopping cart in the parking lot, every door ding and flying debris in the road my car was there! I am ready to scream “stop pickin’ on my car!”
There are two in particular that each time I walked towards my car my eye goes directly to that ding The and scratch. I thought I would just have to live with it until ChipEx came to the rescue.

I was invited to review the Road Rash Car Kit from Chipex; you know I jumped at the chance!! Chipex uses your car manufactures formulation for exact color match!! So your results will be perfect. The Road Rash Car kit arrives in cardboard tub, everything fits neatly inside for easy storing.

In your kit is 50 ml of paint; the container is the same size and style of acrylic craft paint. 75 ml of Blender solution and 65 ml of Polish. 10 micro-brushes. A large blue paper cloth for the blending solution. A small sanding block. A large microfiber towel for polishing. A pair of Nitrile gloves which are latex free. The Husband has large hands and these fit perfectly.

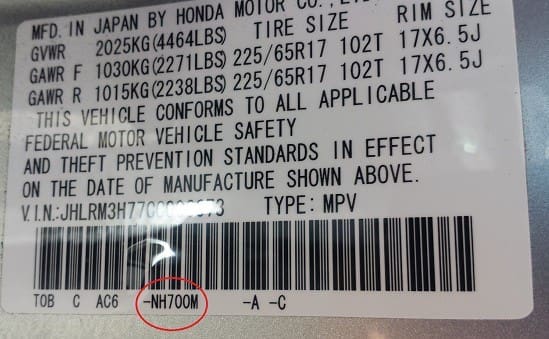
With Chipex revolutionary paint kit you get a 100% color match guarantee. I promise this is easy. From ordering the correct paint color for your car to the application. Starting with the color match; side note here: I may be the only person on the planet that didn’t know this but that metal tag inside the driver’s door? That has the paint color code for your car!! I had no idea! Course I was also the last person to know that above your gas gauge? That little arrow? Yea that shows which side of the car your gas tank is on. All the cars that I review that little tidbit saved me a lot of driving around gas lanes at fill up time! Sorry y’all know my mind wanders!! Back to the inside of the car door; I circled the paint number so you can easily find it.

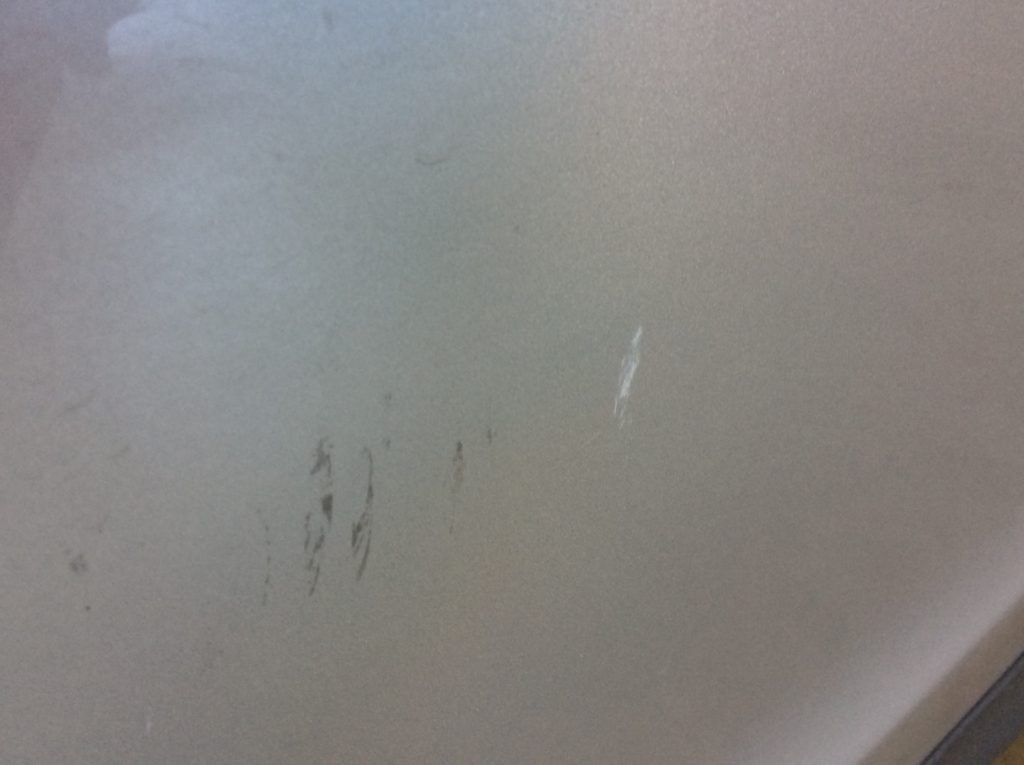
Here are a couple of dings from the passenger side of my car:


First step is to thoroughly clean the area that you want to paint. You will want to be certain all the waxes and polishes are off the area. Next step is to wipe it down with the blending solution.
Be sure to vigorously shake your paint bottle to mix the color. You want the color to be thoroughly mixed. Using one of the micro-brushes enclosed and dab paint into the scratch or in my case gouge! These micro-brushes have a tiny fuzzy top, perfect for filling in dings! Once the paint is dry, you then gently rub in a down ward motion with the blending solution. This removes any excess. This is a good time to see if you have missed any spots and do your paint touch up again.

Some dings and scratches may take more than one coat. My car took 3 coats in that deep ding. The paint dries quickly, usually in 5 minutes. The first coat we noticed that most of the paint came off when we moved to the next step so second coat we waited 15 minutes. The directions say never wait longer than 20 minutes. 15 was the magic number for us.

Just with the glob of paint on the ding the car already looked better! The paint matched to perfection.

Next step take the small sanding block and wrap it around the blue paper cloth. Our tip: We found that tearing the paper cloth into a small piece made it much easier to use. Add a few drops of the blending solution then lightly, like barely even touching your car you will wipe gently side to side to remove any excess paint and raised bumps from the newly painted surface. Seriously, use only the slightest pressure! I admit at this step I was not impressed. The dig looked like I hadn’t done anything. I thought ummm maybe another coat?
 However, The Husband said let’s do Step 3 first, then see how it looks. I don’t say this often (hehehe) but he was right!?! WOW!! WOW!! WOW!!
 Step 3 is applying a small amount of the polish to the yellow cloth. Polish over the repaired area. When the polish is dry there will be a slight white haze, then turn the cloth to a dry clean spot and wipe. OH MY GOSH!! Gone!! You would have to know exactly where the ding was to find it. My car looks amazing!! I am beyond thrilled!!

Chipex® was launched in 2009 so as to provide a fast, very effective and safe solution for the home user to repair paint damage to vehicles to a high standard, without the time and expense of going to a body shop.
The main objective was to make a product that gave both a superior finish compared to that of the conventional touch up paints and additionally was easy for the DIY novice to use.
Following its launch Chipex® has supplied thousands of kits worldwide to both retail and trade customers and is now proud to have received TUV Certification www.tuv.com on the products effectiveness and ease of use.
I’d say they more than exceeded what they set out to do.
WHINES
I don’t have an single whine!! Chipex comes with easy to follow detailed instructions and even hints and tips for a smooth application. The paint is a 100% color match for my beautiful metallic silver CRV!!! I can’t believe the match is so perfect!!
Chipex truly takes the guess work out of ordering the correct color with their step by step color guide to be sure you find your perfect match. (Color of your car, not your soul mate. Sorry. They’re good just not that good)
It’s EASY!! Simply follow the directions step by step!!
- Clean area to be painted
- Apply paint.
- Dry 15 minutes
- Blending in with the paper and sanding block to remove excess paint.
- Apply polish.
- Stand back and admire your scratch free car with it’s mirror like waxed shine. The car is actually SO SHINY you can see The Husband and The Dog in the car shine.
- Last step is to come back here and thank me!
I truly couldn’t be more pleased with my ChipEx kit!! Amazing!!!! Absolutely AMAZING results!!
Follow Chipex on their ♥ Website ♥ Twitter ♥ Facebook ♥ Pinterest ♥ Google+ ♥ Linkedin
GIVEAWAY TIME!!!
This giveaway will end on November 3rd, it is open to US & Canada and Europe only. The winner will be able to order up to $80.00 worth of Chipex products on the website. GOOD LUCK!!!!!!!!
Win a Chipex Bundle
[ReviewDisclaimer]

6 Comments
Kate Sarsfield
Having re-read this post I’ve just popped out to my car & yes, lo & behold, there was the little paint code number. I never knew!
KATE SARSFIELD
Aw, Connie, do something! It says the comp is open to Europe but then it says ‘Sorry, this promotion is not available in your region’! I need this stuff!
Diane K. Brimmer
:That was truly awesome how the scratch was removed. My brother does bumping and painting on the side and is really good at it. So I really am kinda critical about different paint jobs or the bumping repair work they do. And I have to say I am truly impressed with the results.
Tamra Phelps
Well, you were not the last person to know about the metal tag inside the door/paint coloe or the arrow above the gas gauge. Because you just told me, lol. Seriously, this looks like a great product.
Sarah L
I’ll check this out. My 2002 Elantra has its share of nicks.
Thanks for the contest.
michele
I have nothing to do with the cars so I shall pass this on to my husband.. it does sound great for quick repairs though…