
How To Turn Your Backyard Into a Miniature Golf Course
There are only so many books to read, movies to watch, and video games to play before one of your kids says, “I’m bored.” One way to get them outside and have a hoot is to entice them with mini golf. Playing mini golf is a timeless activity that brings family and friends together. However, not everyone can attend one if there isn’t one in your area. Luckily, with a few materials and DIY magic, you can learn how to turn your backyard into a miniature golf course.
Step 1: Plan Your Course
Like any expert golf architect knows, planning and laying out the course is the first step. Space will be at a premium unless you’re working with acres of property. Fortunately, a miniature golf course doesn’t require ample land to make it entertaining for all.
It’s important to make a diligent effort to mix up the design of holes and their obstacles. It will eventually get boring if it feels like you’re playing the same hole all the time. Eventually, even playing the 18th at Pebble Beach will become a bore if you play it on a loop.
Step 2: Gather Materials
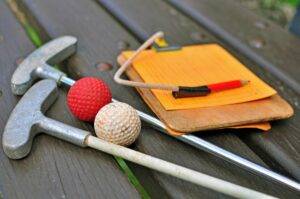
The next step involves gathering the necessary materials. Start with the basics: a putter and golf balls. You can buy mini golf clubs or use a regular golf putter if you have one. You can use plastic cups or small buckets for the holes—just make sure your golf ball fits inside.
For obstacles, use items you already have in your home or garden, from garden gnomes to plant pots, pool toys, or even old toys. If you have chosen a theme for your course, consider items that may fit well with that theme.
Finally, having some chalk or landscaping paint might be useful to mark out the course on your lawn. Remember, you can always add more items and obstacles as you go along and develop your course.
Step 3: Build the Course
 Now that you’ve gathered your materials, it’s time to implement your plan. Begin by positioning your holes according to the plan you sketched previously. If you’re using plastic cups or small buckets for your holes, dig a hole in the ground just deep enough to fit them.
To create the greens, lay down your artificial turf or carpet remnants in the designated areas for each hole. If you’re using a part of your lawn, you will want each area to look like a putting green. Next, set up your obstacles. Use PVC pipes to create tunnels, cut them to your desired length using a saw, and then position them to create a winding path to the hole.
For other obstacles, such as garden gnomes or plant pots, position them strategically around the greens. This might involve trial and error to get the difficulty level right.
Step 4: Add Some Fun Features
The last consideration is to think outside the box and include some entertaining features. Several mini golf courses have extravagant displays that fit their theme. While you may not want to break the bank or spend copious amounts of time making these extras, you can still have fun with scaled-back features. Adding a water hazard, putting a hole on top of a mound, or creating a hidden target will always tickle anyone who can play your course.
Learning how to turn your backyard into a miniature golf course is a fun way to play sports at home. With a little planning and some basic materials, you can create a backyard oasis that provides endless fun hours for your family and friends.
4 Comments
heather
Love this post sounds like a fun thing to have in your backyard.
Tamra Phelps
That would be really cool. Kids would especially love that!
Shirley O
Such a fun project.
Terri Quick
This sounds so fun