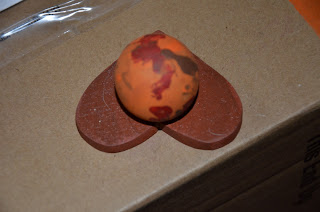
Today’s craft I plan to use as place card holders around the Thanksgiving Dinner table. They are SOOO CUTE!!!
There are 2 different looks. Both are super cute and SUPER easy!!
Wooden Turkeys
Here’s what you need:
Wooden Doll Head Beads for the body. We used 1.1/4″
Wooden Bead for the head. We used 1″
Wooden flat hearts in size 1.1/4” for the feet
Wooden flat hearts in 1″ for the feathers
Small googly eyes the smallest you can find.
 Pipe Cleaners or twine
Glue gun
Acrylic Paints we used Brown, Red, Yellow and Orange
Let’s make some TURKEYS!
 Paint the head and body beads one color. We used a light brown.
Paint the large hearts in dark brown to use as the feet.
Emma figured out the beads were easier to paint with our fingers! She’s brilliant!!


Glue the larger of your beads to the brown large bead. Glue it far up on the bead so that your ‘feather’ hearts can be glued behind it. (Ummmm yea…. it took me a few a LOT tries to get that right). Glue the head on next. We did this 2 ways. Using the hole in the bead to hold the ‘beak’ or the feathers on the top of the head. WOW that’s not explained correctly at ALL!! Maybe I should just stick to showing you in pictures how to do these……..
The feathers (smaller hearts) were much easier done with our fingers.
To put the Turkeys together. Hot glue your 2 small hearts together along the side. They won’t fit smoothly but you will glue them to the base heart (feet)
The hearts get glue on the side and across the bottom. Then glued behind the body bead. Again… better just look at the pictures…. cause this sounds WAYYYY harder than it really is.

But first… take a minute to add sticky foam to Grandson. Laugh hysterically. Take picture.
Back to work…. 
Cut small pieces of pipe cleaners and insert in the hole for the beak. Take another small piece of pipe cleaner and shape in a U and put between the head and body. This covers the glue and well…. just looks darn cute!!! Glue googly eyes in place. And… whoooola!! Adorable Turkeys!!
If you put the beads on with the hole on top… you can put the jute in the hole and make another feather.
The Turkey’s we did today we used pipe cleaners for the ‘beak’ and googly eyes. The Turkeys I had done years before, when my kids were kids I used jute and painted the faces. I personally love LOVE love the ones that the Grandkids made today…….WAY more than the ones we made years ago they have soooo much more personality!! What a
fun way to keep the kids entertained.
Pipe Cleaners or twine
Paint the head and body beads one color. We used a light brown.


One Comment
Mom Does Reviews
Following you on GFC.
Welcome to MBS!
We are looking for bloggers to sign up for our ipad2 giveaway…go here for details:
http://momdoesreviews.com/2011/11/11/give-me-an-ipad-2-giveaway/